Showing posts with label vegetables. Show all posts

Sunday, March 13, 2016

Butternut Squash and Red Bell Pepper Soup

So, this recipe has a bit of a backstory and since you all apparently love reading my writing ramble, I shall share...

About a month ago I was at a pot luck and someone brought a curried butternut squash soup.  It was pretty spectacular and it got me thinking about a butternut squash soup I had made several years ago.  All I could remember was that it also contained bell peppers.  I was positive I had saved the recipe so I went diving into the pit that is the box containing all of my loose recipe sheets.  I came up empty handed.  Not an overly devastating turn of events, but not what I had been hoping for. 

Since my recipe pit proved unhelpful, I turned to internet world.  Apparently, in the world of butternut squash soup, most people are rocking the same playbook.  The crazier varieties may contain an apple, but at the core we have butternut squash, roasted red peppers, an onion, and some savory spices.

All of these items could easily be procured with a quick trip to the grocery.  I however, had a bit of a leg up.  There was still some stock in the freezer and it had turned out extremely well, full of flavor and would certainly save me from having to use extra spices as well as the onion. Sold!

Butternut Squash and Red Bell Pepper Soup
 
Ingredients:
 
6 lbs. Butternut squash - peeled and cubed
3 red bell peppers
3 qts chicken stock
Cinnamon, nutmeg, olive oil, salt, pepper - all to taste
 
Directions:

Okay, I'll be honest, this is a bit of an involved and at times messy recipe.  Therefore, step one, take a deep, calming, centering breath.  Now get cooking.

Set your oven to broil.  Cut the tops off of the peppers, remove the seeds, cut into quarters, and season with olive oil, salt, and pepper.  Place onto a baking sheet and broil for 10 minutes.

 
Next comes the funky bit, using that tin foil you lined your baking sheet with, wrap the peppers into a pouch and let them steam themselves for another ten minutes.  This will loosen the skin and make peeling easier.  Peel the peppers and set aside.


Notice the increase in wrinkles? Steaming helps to separate the skin from the meat, allowing you to peel it off a bit easier.
 
Reduce the oven heat to 375F.
 
Using a very sharp knife, cut the top and bottom off of your squash then cut in half.  Scoop out the seeds.  Now, using a VERY sturdy vegetable peeler, peel the squash and then cut into cubes.  Place onto a foil lined baking sheet, drizzle with olive oil, sprinkle with cinnamon and nutmeg, roast for 30 minutes.
 
 
Put your stock in a pot and add the squash as soon as it's finished in the oven.  Add the peppers and then bring to a boil.  Reduce the heat and simmer for about 20 minutes, until the squash is tender.  It should fall apart as soon as you stick a fork in it.
 
As if things hadn't been messy enough, now it's time to bust out the blender.  If you have an emersion blender this will not be messy, you'll just stick the thing in the pot and blend until smooth.  I, however, am a lazy and stingy individual who see no need to purchase something I will only use once every couple of months.  I already have cabinets full of equipment like that.  So, standard blender it is.
 
If you are going the same route as me, you will want to let it cool a bit.  Then, in small batches, blend soup until smooth.  When it has magically become the desired consistency, give it a taste test.  Add any additional spices you deem necessary.  If you are serving immediately, put back in the pot and bring to a boil, otherwise transfer the soup to an air tight container and chill until ready for its squashy goodness.
 
I garnished with a bit of light cream.

Six pounds of squash will make this soup taste strongly of butternut squash.  If you like the squash, I feel confident stating you will this soup.  The key with how I made it though, is the strong stock. 

If you are not completely confident that your stock is robust, you'll want to add an onion and some additional spices. The onion should be roasted along with the squash and once you've simmered everything together, before you blend, I would give it a taste to see if some additional salt, pepper, nutmeg, and maybe even some thyme should find its way into your soup.

Regardless of how you season, this is a great soup on a cold day.


Sunday, January 24, 2016

Turkey Pot Pie with a Savory Biscuit Crust

We've been down the pot pie road before.  However, there is never a single way to do things (most of the time), especially when it comes to cooking.  We all have our flavor preferences.  We like using certain vegetables over others.  Therefore, I don't feel bad bringing the pot pie train back into the station.  Plus, there is one significant change in this recipe. We are going to rock the biscuit crust!

I couldn't resist the bonus deals on turkeys at the holidays so a ridiculously large 12 pound turkey sat in my freezer until I was ready to go turkey crazy for several weeks.  Now, I do realize that 12 pounds is actually small for a turkey.  It only become ridiculous when you are the only one in the house who is going to eat those 12 pounds...because you are the only one in the house.  After a couple of decades of being on my own, you would assume I would have mastered the art of cooking for one but, it's way more fun to cook as if I were cooking for a tiny army of a tiny country.  And you can't complain because that means you get to read about pot pie and biscuits and probably other turkey leftover concoctions fairly soon.

I hadn't made a pot pie in a while and it is an excellent way to get rid of a lot of poultry in a single shot.  However, I was not keen on the idea of making pie crust...just wasn't feelin' it this time around.  That makes the top choice biscuits, but not just any biscuits would do.  I wanted the biscuits to be a bit savory with the hope that it would enhance the overall flavor of the pot pie.  Mission accomplished I think.  The thyme and rosemary drop biscuits provide a nice boost when combined with the filling's creamy sauce.

Turkey Pot Pie with Savory Biscuit Crust

Ingredients:

Biscuits:

2 c. all purpose flour
1 Tbsp baking powder
3 tsp. sugar
1/2 tsp salt
1/2 c. shortening
1 1/4 c. whole milk
1/2 Tbsp thyme
1/2 Tbsp rosemary

Filling:

2 white potatoes - peeled, diced, boiled and drained
1 medium onion - chopped
1 1/2 c. frozen mixed vegetables
1/2 c. celery -  chopped
1/3 c. butter
1/2 c. flour
1 c. whole milk
3 c. stock
4 c. turkey -  cooked and diced/chopped/shredded

Directions:

Preaheat oven to 425F.  Peel the potatoes and dice them up in to bite sized pieces.  Boil them until they are just soft enough to be pierced with a fork then drain and set aside.

Melt butter in a saute pan over medium heat cook onions until tender, about 5 minutes.  Add celery and cook for an additional 7 minutes.  


Add the flour and mix thoroughly.  This will create a rather gross looking brown paste.  Don't be scared.  It all works out in the end.


Add the stock and milk.  Simmer until thickened, about 10 to 15 minutes.


Once you are happy with the consistency give it a little taste test.  Add salt and pepper as you see fit then add the frozen vegetables, potatoes, and turkey.  Just as a small but important side note...add these new items very carefully.  I was using a 12" saute pan and everything fit but there was a harrowing moment where I was not sure it would.  Go slow to avoid a cream sauce typhoon.


Get this all solidly mixed together then transfer to a 9 x 13 casserole dish.  I went with my stoneware because she hadn't been experiencing the love recently and I decided it was time to rectify this egregious error.


Now to get crackin' on the biscuits.  Sift together flour, baking powder, sugar, and salt.  Then add the thyme and rosemary.  Using a pastry cutter, cut in the shortening.  Continue cutting in until everything gets nice and crumbly.  Mix in the milk until just moistened.  I'm using a bit more milk than would be considered traditional because I am making drop biscuits.  These will not be turned out and kneaded, rolled, and cut.  Instead, once mixed, you will drop them by the spoonful over the pot pie filling.


At no point will I claim I did this last step with any amount of precision.  I took a big spoon and dropped randomly sized dollops of dough as I saw fit.  When you are ready, bake in the oven for approximately 45 minutes,  until the biscuits are golden brown.


These are one of the days where I wish scratch and sniff photography was a thing.  Sooooo good!


The rosemary comes out the most in the biscuits and the creamy pot pie filling is just comfort on a fork.

Sunday, December 13, 2015

Sweet Potato and Apple Casserole

This casserole goes down in the win column and my friends who partook of it at Friendsgiving agreed.  I always get a little nervous though when I serve food to others.  It's an irrational nervousness, I do realize that.  I've been cooking long enough and have a good sense of things that go well together, but there is always that chance that something comes out wrong.  And, if you have read my post about cooking with my father, you already know that me, cooking with orange juice, is a bit of a mixed bag, and this recipe called for juice of an orange.  I'm already feeling the cold sweats of fear as I imagine all the ways that OJ in the oven could cause a sticky smelly disaster.  But, as we have all figured out by now, I survived to tell the tale and bested yet another one of Maria Luisa's recipes.

What I like most about this recipe is its simplicity...sweet potatoes, apples, and orange juice.  That is really all you need.  There is a sweetener and spice thrown into the recipe as well, but those are not essential.  The standout flavor comes from the three ingredients I just listed and it's wonderful.  Maria Luisa did suggest adding liquor, but I decided that was unnecessary.  She also put this recipe in the Dessert and Candy chapter of her cookbook, which I decided was stupid.  Therefore, ignoring the alcohol addition was easy.  I might have considered it IF, IF, she had added it before baking.  She suggested sprinkling on Jamaica rum or kirsch before serving.  A) That's gross and adds nothing.  B) I was taking this to a pot luck where children would be dining with us, so no. C) Kirsch?! I'm not really sure why she wants us growing hair in unnecessary places.  Feel like getting crazy and throwing in an ounce of rum with the orange juice and then baking?  Go for it.  That would probably taste good...but after? No.

Setting aside Maria Luisa's general level of ridiculousness, this is a great recipe.  It's also a good beginner level recipe.  The ability to slice and peel is as skilled as you need to be.  Though, as I am writing this I am remembering a day when a dear dear friend of mine proved that peeling a potato does indeed require skill.  I stood, in abject horror, watching her massacre a normally hearty russet potato.  Before she could demoralize Mr. Russet any further, I yanked him from her grasp and told her that if she wanted to help, she could pour the wine.  Things worked much better in the kitchen after that.  As long as you are not her, you can make this recipe easy peasy.

Sweet Potatoes and Apples
Dolce di Patate e Mele

Ingredients:

2 lbs. sweet potatoes
3 apples - peeled, cored, and sliced fairly thin
Sugar and nutmeg - enough to sprinkle on as directed
Juice of 1 1/2 oranges
2 Tbsp butter - melted

Directions:

Preheat oven to 325F.  Boil the sweet potatoes in water until tender, about 20 minutes.  When they are done, drain, let them cool for a bit, and then peel.  Peeling sweet potatoes is super easy and should not even require a peeler.  The skins will come off right in your hands.

Cut the sweet potatoes into slices, approximately 1/2 inch thick.  You will create the casserole in layers, in a buttered baking dish, starting with the sweet potatoes,


then adding the apples,


and then sprinkling on some sugar and nutmeg.


In total, I probably used about 1/4 cup of sugar and a single teaspoon of nutmeg.  Keep repeating until you have used all of the sweet potatoes and apples.  I ended up with three layers of each.  Finish with a sprinkling of sugar and nutmeg.

Then, pour the juice and melted butter over the top.


Place in the oven to bake for 30 minutes.


Yea, I had this vision of a dark brown and bubbly something but that's not what you get here.  The time in the oven is really just meant to soften the apple slices.  It tastes phenomenal and smells even better as it cooks, that I promise you.  If autumn could be captured in a pan, it would be this.

Sunday, November 29, 2015

Green Bean Souffle

I've always thought of the soufflé as this really scary concoction that requires ultimate precision otherwise it comes out a mess. I haven't changed my mind.  However, now that I have tackled the ominous first soufflé, the idea of doing it again does not necessarily make me quake in my booties.  Check back with me when I decide I've lost my mind enough to try a dessert soufflé and we'll see if I've maintained a façade of cool.

It's really the whole idea of folding in ingredients.  And the egg whites.  Yea, definitely the folding and the egg whites.

I did manage to get the egg whites nice and stiff..... so stiff that the egg white was this giant fluffy puffy ball inside of the whisk attachment to my Kitchen Aid. 


Then the whole folding thing needed to take place.  The entire time I'm very slowly and very carefully placing my wooden spoon in the bowl at the end farthest from me and sliding it down to the bottom, bringing the spoon along the bottom over to me, and then slowly back up again and over the top of the mixture, thinking to myself that this is insanity.  I'm looking around at an empty apartment desperately trying to use the powers of my mind to make someone else magically appear so I have can ask, "is this right?". There are just globs of egg white and cream sauce mixture semi sort of floating together in this bowl.  Folding is madness.  All I wanted to do was take my spoon and whip it together with all the power my muscle-lacking arms could muster. But no, its a friggin soufflé, which means I have to carefully fold so as not to lose air.  Losing air means no rise when it cooks.  No rise means that I don't know what I've cooked but I do know it isn't a soufflé.  Not having a soufflé at the end of this madness would defeat the purpose of my making a green bean soufflé.  Stupid green bean soufflé.


But I did it and I even got a little rise.  I know I got a rise out of my soufflé because there was obvious sinkage an hour later.  I'll count it as a win and one more challenge tackled.

Green Bean Soufflé
Soufflé di Fagiolini
Ingredients:

1 box frozen cut string beans
5 Tbsp butter
1 Tbsp flour
1 c. whole milk
3 Tbsp Parmesan cheese - grated
1/2 tsp. salt
1 egg yolk
2 egg whites  - beat stiff with 1/2 tsp. salt

Directions:

Fill a sauce pot with two quarts water and 1 Tbsp salt.  Bring to a boil then add string beans.  Cook for 20 minutes or until tender.

In a small sauce pot, melt half of the butter then add flour.  Mix into a paste then add the milk.  Put heat on low and cook for 10 to 12 minutes, stir constantly.  Sauce should thicken to the consistency of cream.  Stir in salt.

Remove from heat and rapidly stir in egg yolk and cheese. Set aside.

Drain the green beans.  Melt the rest of the butter in a sauté pan then add the green beans.  Sauté for approximately three minutes.  Put the beans through a sieve then mix with the cream sauce.

Fold in the egg whites.

Place mixture in a buttered baking dish.  Even the top with the back of your spoon.

Currently not looking very appealing...man I hope this works.

Bake in an oven preheated to 350F for 30 to 35 minutes.  Serve immediately.


Heartache from the stress of baking this dish aside, it tasted pretty great.  It had a light creamy texture with a weird bit of sweetness to it.  This recipe is a keeper...I just need to practice my folding technique.


Sunday, November 22, 2015

Cauliflower Soup

It's been a weird fall, almost seems like we missed it somehow.  The weather has been warm except for a few cold days here and there.  However, it is currently mid-November and we are finally looking down the barrel of what should prove to be the longest cold stretch we've had since the season officially started.  What does this all really mean you ask?  It means that I am currently heating my apartment with an oven producing delicious food.  Now, I'm not advocating for using your stove as a primary heating device, that would be dangerous, but Sunday saw the production of 3 quarts of cauliflower soup, 8 baked and Cajun seasoned pork chops, 1 lb of boiled potatoes, and a serving of steamed carrots.  Not a bad day!  And made even better when you realize that most of those items (including the meat) were farm fresh.

The carrots and potatoes were picked up at my local farmer's market.  The pork chops and the bacon that was in the soup, however, now those were from Cugno's Farm in Colchester, Connecticut.  This farm raises a small number of pigs each year that people can buy into.  If you've never done this before you are missing out.  Buy into half a pig and you will end up with a freezer packed with delicious meat you know was raised humanely.  I will recommend against naming your pig though.  Many people seem to have an issue with eating things with names.  I do not suffer from this particular affliction...Loralai Pigginstein made quite the delectable pork chop.  Too far?  Do you want me to go back to the soup?

Cauliflower Soup
Minestra di  Cavolfiore

Ingredients:

1 cauliflower
1/4 c. bacon
1/4 c. olive oil
2 shallots
3 qts. chicken broth
1 Tbsp tomato paste - dissolved in a 1/3 c. of the broth
1 c. ditalini 
Salt and pepper to taste

Directions:

Remove leaves of cauliflower and cut off any bruised spots.  Place it upside down in a large bowl of cold salted water for half an hour.  I am completely baffled as to why Maria Luisa wants me to do this, but I did it anyway.  Honestly, as far as I'm concerned, it did  nothing for the process except waste 30 minutes of my time.


Drain and break cauliflower into flowerets.  I left mine fairly large because I knew that in the end I would be taking a potato masher to it.  Set aside for the time being.

Pour oil into a large sauce pot and over medium heat, saute shallots and bacon.  

FARM FRESH BACON!

Add the tomato paste mixture and simmer for 5 minutes.  Add the cauliflower and simmer for another 10 minutes.


Add broth, cover, bring to a boil, reduce heat to a simmer and cook for 45 minutes.  Using a potato masher, crush the cauliflower into tiny bits. Season to taste.  Add the ditalini and cook until tender, approximately 10 more minutes.


Now, if you are not a cauliflower fan you will not be a fan of this soup.  Once again, this is not an affliction which I suffer from.  I think this soup is great.  It has a savory flavor and hits the spot at lunchtime. 

Sunday, August 2, 2015

Don't hate on the Ramen

Personally, I think Ramen Noodles are every home cook's dirty little secret.  It's cheap.  It can be used a myriad of ways.  But, no one ever wants to be seen purchasing it.  You may even avoid telling people you used it in a recipe until someone gushes and asks for it, at which point you whisper ever so conspiratorially, "I used ramen!"  Don't worry, I look over my shoulder too when I grab a package.  Mainly because I don't want anyone who sees me buying it to think I will be using that sodium overload flavor packet.  That flavor packet should be the first thing you toss out, but the noodles are great.  Honestly, 12 packages for less than a single box of the other stuff.  Embrace the ramen!

Today's particular nugget of goodness, Broccoli Salad with Ramen Noodles, is the result of having had a few different salads that included ramen in the recipe.  I have yet to meet a salad with ramen that I have not like, but I was curious what my version would look like.  And these salads really are all about the look.  It should be colorful.    Things that are colorful grab your attention and beg to be eaten immediately.  This is one of the reasons I included dried cranberries.  I also wanted a little bit of sweetness added to the mix.
Most recipes call for a bag of coleslaw or broccoli slaw, which makes this a super simple thing you can throw together the morning of a party.  However, I decided I should make things complicated and I shredded my own cabbage.  You do not need to do this, you can cut out 3 of the ingredients and reduce prep time by half if you go the bagged route.  Again, though, I like to be complicated so...typically you can purchase half heads in the grocery store, which is what I did.  Since I was taking this salad to a party where lots of other people were bringing salads, I did not want to make a ton.  Therefore, I used half of the half heads I purchased.  Given everything else I add, it was more than enough.  I would say this recipe, as a small side dish, is enough for 8 people.

One major difference with this salad is that I only used a small amount of sugar in the dressing.  Basic dressings for this type of salad include: oil, vinegar, and sugar.  Simple, right?  The catch is the amount of sugar used.  I have seen recipes that call for anywhere from three tablespoons to a half cup.  The ones that use the most sugar are the ones that use distilled white vinegar.  The addition of the sugar makes the vinegar more palatable.  Why on earth you would choose to use a vinegar best left to cleaning your sink or unclogging your bathtub is beyond me, but to each his or her own.  My preference is red wine vinegar.


Broccoli Salad with Ramen Noodles

Ingredients:

1/4 c. Almond slivers - toasted
1/3 c. Dried cranberries
1 pkg. Ramen noodles
3 Green onions
1/4 head Red cabbage
1/4 head Savoy cabbage
1/4 c. Carrots - matchstick style
1/2 c. Broccoli bits
1/4 c. Sunflower seeds
1/2 c. Olive oil
1/3 c. Red wine vinegar
1 Tbsp. sugar

Directions:

Preheat a large saute pan and toast almond slivers.  This should take approximately 3 minutes.  Stir constantly to prevent burning.  I over toasted some of the smaller pieces trying to get as many of the larger pieces toasted as I could.  Those pieces I kept out of the salad.  Set aside.


Take the ramen noodles out of their original packaging and put it in a storage bag.  Using a rolling pin, break up the ramen into small pieces.  Shred the red and green cabbage.  Place everything into a large bowl.


Add the toasted almonds, sunflower seeds, and matchstick carrots.


Add the green onions and dried cranberries.


Now for the broccoli.  Because I wanted the half cup of broccoli to go as far as possible, I cut off small sprigs of broccoli from a larger crown and chopped that up.  In all it was about a third of the crown I had purchased.  Stir until everything is well mixed.

In a small bowl, whisk the oil and vinegar until emulsified.  Add the sugar and whisk until dissolved.  I do realize that above there is a short rant about adding sugar, but here we are only using a single tablespoon.  It is just enough to cut through the acid so no one has that not always pleasant bite of vinegar as they munch on this salad.

Add the dressing to the salad and mix well.  Cover the bowl with some saran wrap and let it sit in the refrigerator for about two hours.  Letting the salad sit allows the dressing to soften the ramen.  That part is key, do not skimp on the resting time!


The vegetables and nuts have a nice crunch.  The dried cranberries add a touch of sweetness.  When all is said and done, you will have a great salad to add to your summer barbecue.

Sunday, June 21, 2015

Farmers Market Finds

As the summer weather begins to ramp up, so do the outdoor farmers markets.  I love shopping at these markets because not only am I supporting my local growers and producers, but I also get to be a bit more adventurous with my purchases.  Local growers, from my own personal experience, will offer items you would not find in your larger grocery stores.  You also get to meet the people growing your food and ask about the products they are offering.  I have walked away from the market with new produce to try and recipe suggestions... just what a cooking addict needs!


I went a couple of weeks ago to one market and walked away with a new type of celery to try.  I also picked up lunch - vegetarian nim chow.  The nim chow was amazing and I will soon be returning to that market for more.


This celery is a lot thinner than what you would pick up in the regular grocery store and it is a full tube as opposed to the u-shape most of us are probably used to.  I asked the farmer if the entire celery was edible and for preparation suggestions.  She told me I can eat everything, leaves included, and that many people use it in soup.  When I got it home, I decided to throw it raw into a salad.  I will never do that again.  It has such a strong flavor that eating it raw is honestly kind of gross.  The leaves are really bitter and the stalk has what I can only describe as a soapy flavor.  It is simply no good.  So, I gave it a day and gave some cooking options a thought.  The farmer had suggested soup and I had some Arborio rice in the fridge... see where I am going with this yet?


I decided to make some risotto, flavored with celery and scallions.

Ingredients:

1 scallion - sliced
1 stalk celery - sliced
2 c. stock (1 bullion cube dissolved in 2 c. boiling water)
2 c. water
1/2 c. white wine
1 c. Arborio rice
1 Tbsp oil

Directions:

Heat oil on medium in a large sauté pan.  Add scallions and celery and sauté until tender, approximately 7 minutes.  Add the rice, give it a couple stirs, then add the white wine.  Stirring occasionally, cook until the wine is completely absorbed.  This should take about 3 - 5 minutes.


At this point, incorporate the stock a half cup at a time and then incorporate the water a half cup at a time.  Each addition will take more time to absorb the farther into the cooking process you get.  The first half cup will take 3 - 5 minutes and the last could take up to 7 minutes.

In the end, you get a flavorful risotto that can be used as a side dish.  The celery held up well during the cooking process but, the long and slow cook broke down the flavor and allowed for the celery to come through. No bitterness in this recipe and it is definitely something I will make again.

Sunday, May 17, 2015

Spinach and Mushroom Rollatini

As I have mentioned before, I am a bit of an over shopper.  This time around, I had an extra box of lasagna noodles in addition to the half a box I had left from the previous week's kitchen adventure.  I did not want to make just another lasagna so I decided I would go crazy and do rollatini instead.  At this point you are thinking to yourself "but wait...last week she said she used no-bake lasagna noodles.  How do you use those to make rollatini!?"  The answer my friends: hot water and a 7 minute pre-soak.  MAGIC!

The Spinach and Mushroom Rollatini recipe follows quite closely with the Italian Lasagna recipe.  The cheese mixture is almost exactly the same and I made my sauce the same just minus the meat.  Based on the amount of filling I put on each noodle, I was able to fit 12 total into the baking dish, so this recipe makes 6 servings.


Ingredients:

1 pkg. chopped spinach - thawed and excess liquid squeezed out
2 c. sliced mushrooms
4 oz. creamy goat cheese rolled in black pepper
15 oz. part skim ricotta cheese
shredded mozzarella
1 c. Parmesan cheese - grated
1 large egg
1/4 c. chopped parsley
1 28 oz. can crushed tomatoes with basil
1 6 oz can tomato paste
1 onion - chopped
2 Tbsp. partially dried basil
1 Tbsp. sugar
olive oil
1 1/2 pkgs no-bake lasagna noodles

Directions:

Preheat oven to 400F

In a medium saute pan, heat olive oil.  Add mushrooms and cook until tender, about 10 -15 minutes.

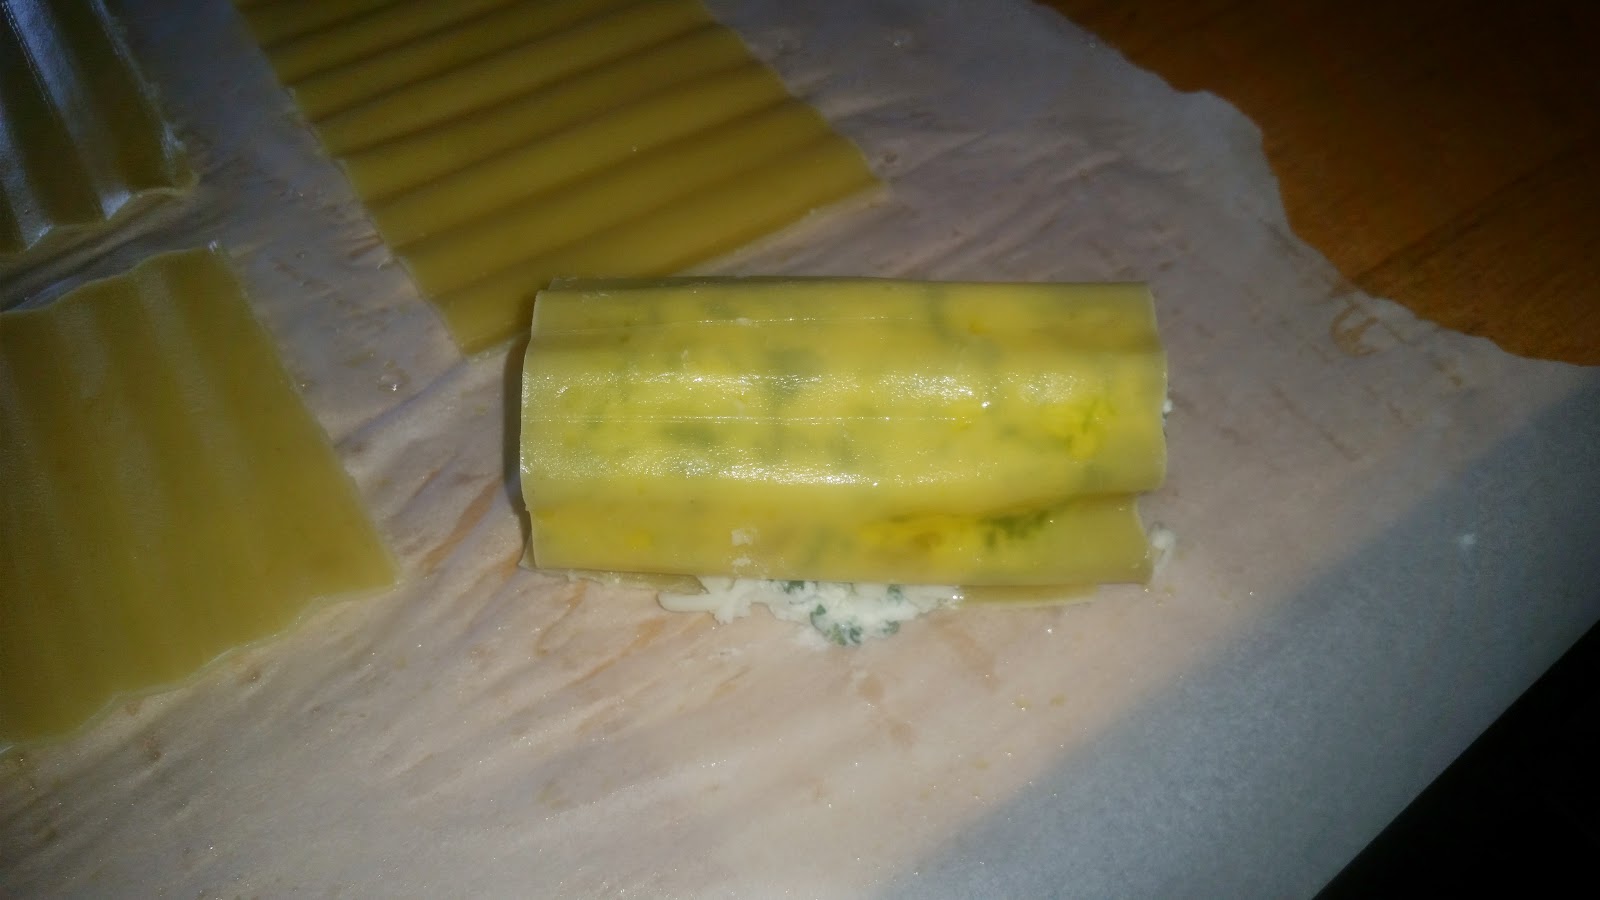
While the mushrooms are cooking, boil several cups of water.  Fill a 9x9 baking dish about halfway with the water and begin soaking lasagna noodles. Soak each noodle for about 7 minutes then lay out on parchment paper.  If you are worried about the noodles sticking to the dish or each other, add a bit of olive oil.

Once cooked the mushrooms are cooked, set aside to cool.  Add a bit more oil to the saute pan and then cook onions until tender, about 7 minutes.  Add crushed tomatoes, tomato paste, 1/2 the parsley, and the basil.  Simmer until the sauce thickens up, about 10 minutes.  When I taste tested the sauce I found it to be too acidic for me so I added 1 Tbsp of sugar for balance.

In a large bowl, combine spinach, mushrooms, goat cheese, ricotta, Parmesan cheese, egg, and the remaining parsley.  Make sure it is well mixed, you want a fork full of everything in each bite!


No that you have all your parts, time to put it all together.  Spoon a little less than half of the sauce into the bottom of a 9x13 baking dish.  On one of the lasagna noodles, spoon out about 3 Tbsp worth of filling and spread across.


Sprinkle with the mozzarella and then roll.


Repeat until you have filled the dish.


Spoon enough sauce on top to cover the rollatini and then sprinkle with Parmesan cheese.


Bake for 30 minutes.


The result, in my opinion, is spectacular.  The cheese has a nice flavor and the mushrooms provide you with something you can sink your teeth into.  This recipe is also easily adjusted.  If you want something heavier on the vegetables, just reduce the amount of cheese.  The noodles will not get mushy even with the pre-soak and baking.

Sunday, March 22, 2015

Broccoli Soup

I am writing these posts at the height of an awful New England winter so of course all I can really think about is warm comfort food.  So soup it is!  For me, soup is this amazing substance where everything you need for a meal comes together in a single pot.  On a cold Sunday, you just heat up a bowl and then sit back on the couch with that warm substance with amazing scents resting in your hand, slowly eating while you binge watch your favorite show. 

I also like taking soup to work because it is one of the few things that forces me to take my mind off whatever it is that I am doing.  It's not a sandwich that can be held in one hand while I peck away at an email or read a paper.  If I don't want a mess on my desk I have to concentrate on my food.  My job is not a stressful thing that requires my full attention 24/7, but I am just a natural workaholic.  Lunch is a completely underappreciated meal, so I am grateful for foods that take my mind elsewhere.

Broccoli Soup

1 qt stock (1 quart = 4 cups)
6 c. broccoli (approximately 2 medium sized heads) - chopped
2 potatoes - peeled and diced
6 cipollini onions (pick the 6 largest from the bag)
2 Tbsp butter

First, let's talk cipollini onions.  They come in a bag similar to pearl onions.  My preference for these onions is due to their sweetness and fragrant nature once cooked.  Their higher sugar content may change the overall flavor of your soup so bare that in mind.  If you want a taste that is more traditional, use 1 large yellow onion - chopped.

Now, on to the steps...


In a large saucepan melt butter and saute onion until tender.  Add stock and broccoli.  Bring to a boil then reduce heat and simmer until broccoli is tender.  I simmered it for about 20 minutes.


Using a blender or hand mixer, puree until smooth.  Put soup back on the stove and bring up to a boil.  Add the potatoes and cook until tender.  Add salt and pepper to taste.


This soup meets my own personal preference.  I like to be able to sink my teeth into something, which is why I do not cook the potatoes with the broccoli and puree the whole thing.  I even prefer my tomato soup chunky!  Therefore, if you are looking for a soup on the creamier end, add the potatoes sooner and go to town with a blender.

Enjoy!