Showing posts with label Lunch. Show all posts

Sunday, May 1, 2016

Stuffed Artichokes

Stuffed artichokes have been on my mind for awhile.  They are a fun meal that require any annoying amount of prep works, which is why it took so long to muster up the nerve to actually put a recipe together.  Obviously I put a little twist into the typical artichoke stuffing and this twist was crab meat.

I'm not really sure why I decided on crab meat, but it was one of those random ideas and it got stuck in my head.  So I rolled with it.  FYI...crab meat is not cheap, so feel free to not to use it.  I, however, really enjoyed the addition.  It provided just a light, added flavor.

Stuffed Artichokes

Ingredients:

4 artichokes
2 c. Seasoned breadcrumbs
1/2 c. crab meat - finely shredded
1/4 c. blanched slivered almonds - toasted
3 Tbsp Parmesan cheese
2 Tbsp Parsley - chopped
1/4 c. olive oil + 2 Tbsp

Directions:

First, prep your artichoke for stuffing.  Cut the stem and snip off the pointed tips of the leaves.  Rap the artichoke on the counter a couple of times to help separate the leaves to allow for easier stuffing. I also suggest snipping as many points off the leaves at the center of the artichokes.


Preheat a small skillet on the stove and lightly toast the almonds.  It should only take about three minutes.

Mix the breadcrumbs, crab meat, almonds, cheese, and parsley.  Slowly add the 1/4 cup of olive oil, mixing the filling just until it moistens and is "pack-able."

Stuff each artichoke, pressing the stuffing down to make sure each one is completely stuffed and you get a bit of stuffing each time you remove a leaf.

Place the artichokes into a dutch oven and add about 1 1/2 inches of water.  Add the rest of the olive oil to the water.


Place the dutch oven on the stove and bring the water to a boil.  Reduce the heat to low, cover and simmer for 80 minutes or until the leaves become soft enough to pull out easily.


Because these were steamed, they will not have a browned, crunchy top.  They are however, just as good, and on a hot day it's nice to not have the oven going for over an hour.

These made a great light lunch and the almonds provided a nice contrast in the stuffing's texture.

Sunday, April 17, 2016

Salmon Rolls

Of all my favorite ethnic foods, sushi is my go-to.  I have no qualms with grabbing a roll at the grocery store.  If I want to celebrate a successful day at work, at the sushi bar I sit.  When anyone in my immediate family is having a birthday, the local sushi restaurant is our go-to establishment.

Given all of these sushi-centric eating decisions, it's a little sad that I have not attempted to make sushi at home.  This sadness is only amplified by the fact that I own a sushi rolling mat and a special spoon for tossing the sushi rice.  That's right...I own a sushi rice spoon.  Now I really feel like the big girl on campus.

The mat and spoon were actually a gift...well, sort of a gift.  It was more like a "I'm cleaning out my cabinets and you seemed liked someone who would want this" kind of situation.  Which is exactly how it went down.  I was in grad school, in another life, and one of my classmates was packing up for a move.  He realized he needed to make some serious decisions about what he kept and what he tossed and since I'm a serious kitchen gadget hoarder, I benefited greatly from his downsizing.

I decided to use smoked salmon in my first ever sushi rolls.  Maybe one day I'll have a fish guy that I'll trust enough to buy raw fish from and make sushi out of it.  For now, I'll stick with food I'm 97.3% positive will not give me some sort of weird stomach worm.  For my salmon companion, I went with mango in one roll and avocado in the other.  In my opinion, these are pairings that will have everyone going back for more rolls.

Salmon Rolls

Ingredients:

1 1/2 c. sushi rice
3 c. water
1/2 c. rice vinegar
1 Tbsp vegetable oil
1/4 c. sugar
1 tsp. salt
8 Nori Toasted Seaweed Sheets
8 oz smoked salmon
8 avocado slices
8 mango slices
Soy sauce for dipping

Directions:

In a medium sauce pan, combine water and rice and bring to a slow boil.  Reduce heat to low, cover, and let simmer for about 20 minutes or until all water is absorbed and rice is completely cooked.

In a medium sauce pan combine the vinegar, oil, sugar, and salt.  Heat on medium and stir until the sugar dissolves.  This should only take a few minutes.

Combine the rice and the liquid in a large bowl.  Mix until the rice is well coated.  Let cool completely before working with it.

Once the rice is cooled, lay out your bamboo rolling mat and place a seaweed sheet in the center.


Carefully create a thin layer of rice on the seaweed.  The seaweed is not overly delicate, but it will rip easily so you do not want to get all Incredible Hulk when spreading out the rice.  You also want to be sure your rice layer is thin.  

Bad layering
You'll know you added too much rice once you've rolled it and you get a lot of rice and tiny bit of filling.

Once you have your rice layer, add your filling along the top edge of the rice.  Roll one had an ounce of smoked salmon and 2 slices of avocado.

Good layering
Roll two had salmon and mango.


Using the mat, roll up your sushi.


You may need to use your fingers to keep the filling in place as you fold the top edge over.


The seaweed might slip around a bit as you are rolling so apply consistent pressure, as if you were rolling and shaping bread dough.


Even a sushi novice, such as myself, can get a decent roll on the first try.  Repeat the process until you have all of your rolls and then cut and serve.


I really enjoyed both rolls, but I think my favorite was the salmon and mango.  The salty, smoky flavor from the salmon paired amazingly with the sweetness of the mango.  Two rolls made the perfect weekend lunch.  Enjoy!

Sunday, January 3, 2016

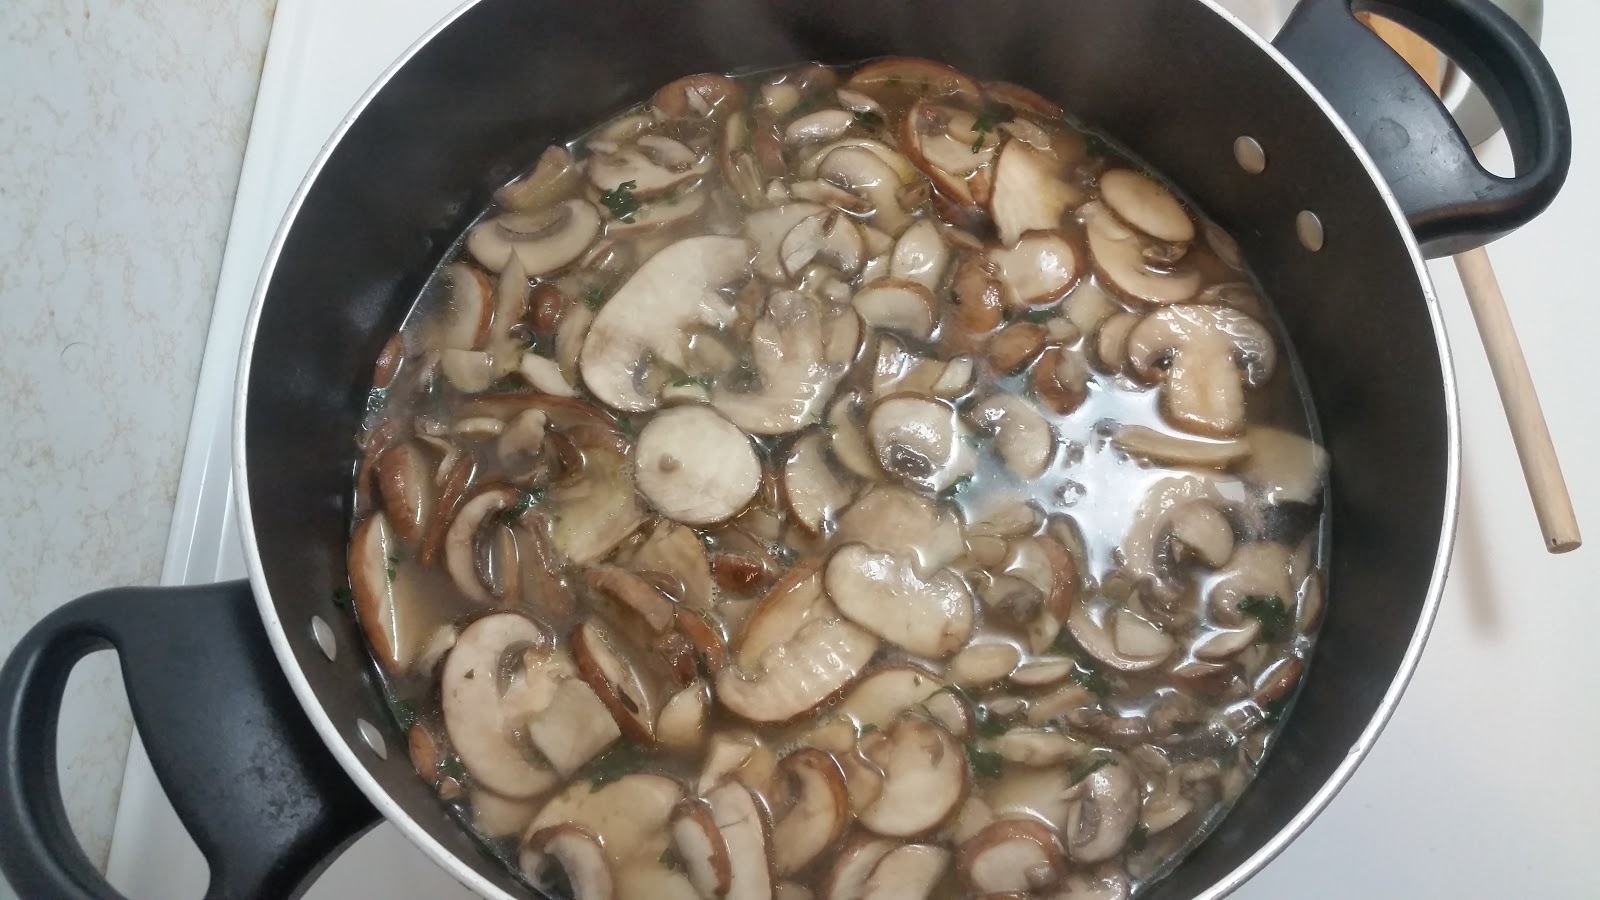
Mushroom Soup

Yea, there is just not much to say on this one - it's mushroom soup.  It looks like mushrooms.  It tastes like mushrooms.  I like mushrooms, so for me, this was a good choice.  But that's all I've really got...no I'm lying, I always have something else to add.

I was a bit disappointed that Maria Luisa didn't give me a suggestion on the type of mushroom I should use.  Under ingredients she simply says "1 pound mushrooms, sliced thin."  Even in the most basic of grocery stores there is still, usually, a set of options for mushrooms in the produce section.  You have the basic white mushroom, the baby bella mushrooms, and portabellas.  I thought portabellas would be a bit much for a soup, so that left me with white v. bella.  They have a similar taste, but bellas have a better look.  When cooked, the white mushrooms get a bit grey.  For the bellas, their brownish, rustic hue holds well even throughout the cooking process.  Baby bellas for the win!

Mushroom Soup
Zuppa di Funghi

Ingredients:

1 lb. baby bella mushrooms - sliced thin
2 slices bacon - finely chopped
2 1/2 Tbsp butter
1 Tbsp parsley - chopped
1 egg - beaten
1/4 c. Parmesan cheese - grated
6 c. chicken broth
Salt and pepper to taste

Directions:

In a large saute pan, melt butter then saute bacon and parsley until bacon is slightly crisp.  


If you can't tell from this picture, I went the semi-healthy route and used turkey bacon.  With turkey bacon, in this particular situation, you face the issue of not really being able to see it become crisp.  It is a much more pronounced change with regular bacon. So, here, what you need to watch for is the foaming that occurs as the fat in the bacon cooks out and heats along with the butter in the pan.  When you have a full froth you have cooked the bacon enough to move on.

Add mushrooms and simmer for 5 minutes.


Place  broth in a large sauce pot and bring to a boil.  Add the mushrooms, season to taste, and simmer for 15 minutes.


Okay, so at this point your next step in Maria Luisa's world is to mix together the beaten egg and Parmesan cheese in a soup tureen then pour in the soup and serve.  In Brianne's world you mix the beaten egg and Parmesan cheese together and pour that into the pot of soup.  In whichever direction you choose to pour your ingredients, the same thing happens - scrambled eggs.


I honestly do not know if Maria Luisa meant for this to happen or if I did something wrong but it totally looks like I attempted some weird egg drop/mushroom soup mash-up.


On the upside, I kind of love how this soup tastes.  The baby bellas held up well and just give the broth a more robust look.  Because they held onto their texture you feel like you are having an actual meal.  Soups that do not have much in them always make me nervous because I think "will I be starving in an hour?" But, this soup tides me over.  Give it a try and let me know what you think!

Sunday, November 22, 2015

Cauliflower Soup

It's been a weird fall, almost seems like we missed it somehow.  The weather has been warm except for a few cold days here and there.  However, it is currently mid-November and we are finally looking down the barrel of what should prove to be the longest cold stretch we've had since the season officially started.  What does this all really mean you ask?  It means that I am currently heating my apartment with an oven producing delicious food.  Now, I'm not advocating for using your stove as a primary heating device, that would be dangerous, but Sunday saw the production of 3 quarts of cauliflower soup, 8 baked and Cajun seasoned pork chops, 1 lb of boiled potatoes, and a serving of steamed carrots.  Not a bad day!  And made even better when you realize that most of those items (including the meat) were farm fresh.

The carrots and potatoes were picked up at my local farmer's market.  The pork chops and the bacon that was in the soup, however, now those were from Cugno's Farm in Colchester, Connecticut.  This farm raises a small number of pigs each year that people can buy into.  If you've never done this before you are missing out.  Buy into half a pig and you will end up with a freezer packed with delicious meat you know was raised humanely.  I will recommend against naming your pig though.  Many people seem to have an issue with eating things with names.  I do not suffer from this particular affliction...Loralai Pigginstein made quite the delectable pork chop.  Too far?  Do you want me to go back to the soup?

Cauliflower Soup
Minestra di  Cavolfiore

Ingredients:

1 cauliflower
1/4 c. bacon
1/4 c. olive oil
2 shallots
3 qts. chicken broth
1 Tbsp tomato paste - dissolved in a 1/3 c. of the broth
1 c. ditalini 
Salt and pepper to taste

Directions:

Remove leaves of cauliflower and cut off any bruised spots.  Place it upside down in a large bowl of cold salted water for half an hour.  I am completely baffled as to why Maria Luisa wants me to do this, but I did it anyway.  Honestly, as far as I'm concerned, it did  nothing for the process except waste 30 minutes of my time.


Drain and break cauliflower into flowerets.  I left mine fairly large because I knew that in the end I would be taking a potato masher to it.  Set aside for the time being.

Pour oil into a large sauce pot and over medium heat, saute shallots and bacon.  

FARM FRESH BACON!

Add the tomato paste mixture and simmer for 5 minutes.  Add the cauliflower and simmer for another 10 minutes.


Add broth, cover, bring to a boil, reduce heat to a simmer and cook for 45 minutes.  Using a potato masher, crush the cauliflower into tiny bits. Season to taste.  Add the ditalini and cook until tender, approximately 10 more minutes.


Now, if you are not a cauliflower fan you will not be a fan of this soup.  Once again, this is not an affliction which I suffer from.  I think this soup is great.  It has a savory flavor and hits the spot at lunchtime. 

Sunday, August 2, 2015

Don't hate on the Ramen

Personally, I think Ramen Noodles are every home cook's dirty little secret.  It's cheap.  It can be used a myriad of ways.  But, no one ever wants to be seen purchasing it.  You may even avoid telling people you used it in a recipe until someone gushes and asks for it, at which point you whisper ever so conspiratorially, "I used ramen!"  Don't worry, I look over my shoulder too when I grab a package.  Mainly because I don't want anyone who sees me buying it to think I will be using that sodium overload flavor packet.  That flavor packet should be the first thing you toss out, but the noodles are great.  Honestly, 12 packages for less than a single box of the other stuff.  Embrace the ramen!

Today's particular nugget of goodness, Broccoli Salad with Ramen Noodles, is the result of having had a few different salads that included ramen in the recipe.  I have yet to meet a salad with ramen that I have not like, but I was curious what my version would look like.  And these salads really are all about the look.  It should be colorful.    Things that are colorful grab your attention and beg to be eaten immediately.  This is one of the reasons I included dried cranberries.  I also wanted a little bit of sweetness added to the mix.

Most recipes call for a bag of coleslaw or broccoli slaw, which makes this a super simple thing you can throw together the morning of a party.  However, I decided I should make things complicated and I shredded my own cabbage.  You do not need to do this, you can cut out 3 of the ingredients and reduce prep time by half if you go the bagged route.  Again, though, I like to be complicated so...typically you can purchase half heads in the grocery store, which is what I did.  Since I was taking this salad to a party where lots of other people were bringing salads, I did not want to make a ton.  Therefore, I used half of the half heads I purchased.  Given everything else I add, it was more than enough.  I would say this recipe, as a small side dish, is enough for 8 people.

One major difference with this salad is that I only used a small amount of sugar in the dressing.  Basic dressings for this type of salad include: oil, vinegar, and sugar.  Simple, right?  The catch is the amount of sugar used.  I have seen recipes that call for anywhere from three tablespoons to a half cup.  The ones that use the most sugar are the ones that use distilled white vinegar.  The addition of the sugar makes the vinegar more palatable.  Why on earth you would choose to use a vinegar best left to cleaning your sink or unclogging your bathtub is beyond me, but to each his or her own.  My preference is red wine vinegar.


Broccoli Salad with Ramen Noodles

Ingredients:

1/4 c. Almond slivers - toasted
1/3 c. Dried cranberries
1 pkg. Ramen noodles
3 Green onions
1/4 head Red cabbage
1/4 head Savoy cabbage
1/4 c. Carrots - matchstick style
1/2 c. Broccoli bits
1/4 c. Sunflower seeds
1/2 c. Olive oil
1/3 c. Red wine vinegar
1 Tbsp. sugar

Directions:

Preheat a large saute pan and toast almond slivers.  This should take approximately 3 minutes.  Stir constantly to prevent burning.  I over toasted some of the smaller pieces trying to get as many of the larger pieces toasted as I could.  Those pieces I kept out of the salad.  Set aside.


Take the ramen noodles out of their original packaging and put it in a storage bag.  Using a rolling pin, break up the ramen into small pieces.  Shred the red and green cabbage.  Place everything into a large bowl.


Add the toasted almonds, sunflower seeds, and matchstick carrots.


Add the green onions and dried cranberries.


Now for the broccoli.  Because I wanted the half cup of broccoli to go as far as possible, I cut off small sprigs of broccoli from a larger crown and chopped that up.  In all it was about a third of the crown I had purchased.  Stir until everything is well mixed.

In a small bowl, whisk the oil and vinegar until emulsified.  Add the sugar and whisk until dissolved.  I do realize that above there is a short rant about adding sugar, but here we are only using a single tablespoon.  It is just enough to cut through the acid so no one has that not always pleasant bite of vinegar as they munch on this salad.

Add the dressing to the salad and mix well.  Cover the bowl with some saran wrap and let it sit in the refrigerator for about two hours.  Letting the salad sit allows the dressing to soften the ramen.  That part is key, do not skimp on the resting time!


The vegetables and nuts have a nice crunch.  The dried cranberries add a touch of sweetness.  When all is said and done, you will have a great salad to add to your summer barbecue.

Sunday, February 22, 2015

Pork Patties

I have a bad habit of cooking like I have an army residing in my house.  Truth be told, it is just me.  Thankfully, I am all about the leftovers.  Sometimes though, I am able to catch myself before cooking too much food but not before I've purchased it.  When I was shopping for the pork pie I bought two pounds of ground pork but only used one pound.  Into the freezer went the extra pound.  The other day I decided to pull it out and make pork patties.

Ingredients:

1 lb ground pork
6 strips bacon
1 sprig thyme
2 sage leaves - chopped
1 tsp. black pepper
1/2 tsp. salt

Take the 6 strips of bacon and chop them up using a food processor.  You can just finely chop the bacon, but it is faster and a bit more thorough when done via the food processor.

mmmmm, yummy :)

Combine all the ingredients, thoroughly mixing them together.  I recommend just getting in there with your hands.


Divide mixture into four equally sized patties.


Pan fry or grill until thoroughly cooked and the juices run clear.

Living in an apartment with no balcony, I went the pan fry route.  Because my patties were fairly thick, it took about 10 minutes per side.  I flipped several times to avoid burning the outside before the inside cooked through.

Dress as you please.


As I was eating my fabulous pork patty, I felt that it reminded me a bit of a breakfast sausage.  I think the combination of the bacon with the sage and thyme give it more of a sausage taste over the mild flavor pork normally has.  Personally I loved it, but that's my own humble opinion.  Also, I should stress that anyone planning to pan fry these might want to consider making them smaller.  Make 6 or 8 patties versus the 4  that I made.  Unless you want a thick patty, to which I say, crack on!