Showing posts with label appetizer. Show all posts

Sunday, May 1, 2016

Stuffed Artichokes

Stuffed artichokes have been on my mind for awhile.  They are a fun meal that require any annoying amount of prep works, which is why it took so long to muster up the nerve to actually put a recipe together.  Obviously I put a little twist into the typical artichoke stuffing and this twist was crab meat.

I'm not really sure why I decided on crab meat, but it was one of those random ideas and it got stuck in my head.  So I rolled with it.  FYI...crab meat is not cheap, so feel free to not to use it.  I, however, really enjoyed the addition.  It provided just a light, added flavor.

Stuffed Artichokes

Ingredients:

4 artichokes
2 c. Seasoned breadcrumbs
1/2 c. crab meat - finely shredded
1/4 c. blanched slivered almonds - toasted
3 Tbsp Parmesan cheese
2 Tbsp Parsley - chopped
1/4 c. olive oil + 2 Tbsp

Directions:

First, prep your artichoke for stuffing.  Cut the stem and snip off the pointed tips of the leaves.  Rap the artichoke on the counter a couple of times to help separate the leaves to allow for easier stuffing. I also suggest snipping as many points off the leaves at the center of the artichokes.


Preheat a small skillet on the stove and lightly toast the almonds.  It should only take about three minutes.

Mix the breadcrumbs, crab meat, almonds, cheese, and parsley.  Slowly add the 1/4 cup of olive oil, mixing the filling just until it moistens and is "pack-able."

Stuff each artichoke, pressing the stuffing down to make sure each one is completely stuffed and you get a bit of stuffing each time you remove a leaf.

Place the artichokes into a dutch oven and add about 1 1/2 inches of water.  Add the rest of the olive oil to the water.


Place the dutch oven on the stove and bring the water to a boil.  Reduce the heat to low, cover and simmer for 80 minutes or until the leaves become soft enough to pull out easily.


Because these were steamed, they will not have a browned, crunchy top.  They are however, just as good, and on a hot day it's nice to not have the oven going for over an hour.

These made a great light lunch and the almonds provided a nice contrast in the stuffing's texture.

Sunday, April 17, 2016

Salmon Rolls

Of all my favorite ethnic foods, sushi is my go-to.  I have no qualms with grabbing a roll at the grocery store.  If I want to celebrate a successful day at work, at the sushi bar I sit.  When anyone in my immediate family is having a birthday, the local sushi restaurant is our go-to establishment.

Given all of these sushi-centric eating decisions, it's a little sad that I have not attempted to make sushi at home.  This sadness is only amplified by the fact that I own a sushi rolling mat and a special spoon for tossing the sushi rice.  That's right...I own a sushi rice spoon.  Now I really feel like the big girl on campus.

The mat and spoon were actually a gift...well, sort of a gift.  It was more like a "I'm cleaning out my cabinets and you seemed liked someone who would want this" kind of situation.  Which is exactly how it went down.  I was in grad school, in another life, and one of my classmates was packing up for a move.  He realized he needed to make some serious decisions about what he kept and what he tossed and since I'm a serious kitchen gadget hoarder, I benefited greatly from his downsizing.

I decided to use smoked salmon in my first ever sushi rolls.  Maybe one day I'll have a fish guy that I'll trust enough to buy raw fish from and make sushi out of it.  For now, I'll stick with food I'm 97.3% positive will not give me some sort of weird stomach worm.  For my salmon companion, I went with mango in one roll and avocado in the other.  In my opinion, these are pairings that will have everyone going back for more rolls.

Salmon Rolls

Ingredients:

1 1/2 c. sushi rice
3 c. water
1/2 c. rice vinegar
1 Tbsp vegetable oil
1/4 c. sugar
1 tsp. salt
8 Nori Toasted Seaweed Sheets
8 oz smoked salmon
8 avocado slices
8 mango slices
Soy sauce for dipping

Directions:

In a medium sauce pan, combine water and rice and bring to a slow boil.  Reduce heat to low, cover, and let simmer for about 20 minutes or until all water is absorbed and rice is completely cooked.

In a medium sauce pan combine the vinegar, oil, sugar, and salt.  Heat on medium and stir until the sugar dissolves.  This should only take a few minutes.

Combine the rice and the liquid in a large bowl.  Mix until the rice is well coated.  Let cool completely before working with it.

Once the rice is cooled, lay out your bamboo rolling mat and place a seaweed sheet in the center.


Carefully create a thin layer of rice on the seaweed.  The seaweed is not overly delicate, but it will rip easily so you do not want to get all Incredible Hulk when spreading out the rice.  You also want to be sure your rice layer is thin.  

Bad layering
You'll know you added too much rice once you've rolled it and you get a lot of rice and tiny bit of filling.

Once you have your rice layer, add your filling along the top edge of the rice.  Roll one had an ounce of smoked salmon and 2 slices of avocado.

Good layering
Roll two had salmon and mango.


Using the mat, roll up your sushi.


You may need to use your fingers to keep the filling in place as you fold the top edge over.


The seaweed might slip around a bit as you are rolling so apply consistent pressure, as if you were rolling and shaping bread dough.


Even a sushi novice, such as myself, can get a decent roll on the first try.  Repeat the process until you have all of your rolls and then cut and serve.


I really enjoyed both rolls, but I think my favorite was the salmon and mango.  The salty, smoky flavor from the salmon paired amazingly with the sweetness of the mango.  Two rolls made the perfect weekend lunch.  Enjoy!

Sunday, April 10, 2016

Indian Chickpea Samosas

I love Indian food.  My favorite menu item is Thali - that large dish of small plates.  This way I get an amazing meal without having to make a real decision about which food to order.  With Thali, I get it all!  However, making Indian food was something I always found rather daunting.

Indian food has a very distinct flavor pallet that requires a lot of spices you can't always get at your regular grocery store...masala being the biggest one.  Masala can be fudged (to a certain extent) since it is just a mix of other toasted and ground spices.  However, who really wants to go out and buy coriander, turmeric, cumin, cardamom, and ginger and then combine them in just the right combination?  Searching the state for masala is actually the saner decision.

However, I decided it was time to just get over it and try my hand at some Indian food.  And, I was able to find two different types of masala.  Where? BED BATH AND BEYOND! That store continues to amaze me while also being the devil.  If you are able to go into that store and walk out with only the items you originally intended to purchase, you just might be my new idol.  I went in there a couple of months ago for a bath towel, shower curtain, and bath mat.  I left with a bath towel, shower curtain, and bath mat, and a cutting board, cardamom pods, juniper berries, and a tiny jar of clotted cream.  Don't ask.  This is just what happens when I am allowed to shop unsupervised.

So, what did my magic discover of garam masala at Bed Bath & Beyond mean?  It meant I was going to try my hand at samosas. I decided to be a bit non-traditional with the filling and went with a chickpea masala.  I also decided to be a bit healthier and baked them instead of frying.  They tasted fine baked, but the texture and color is very different than if you fried them.  Regardless, they made a great appetizer.

 
Indian Chickpea Samosas
Ingredients:
 
Dough
 
2 c. all purpose flour
4 Tbsp vegetable oil
1/2 c. cold water
1/2 tsp. salt
 
Filling
 
4 cans (15.5 oz each) chickpeas
4 Tbsp vegetable oil
1 lg onion - chopped
2 Tbsp ginger paste
1/4 tsp. garam masala
2 lg tomatoes - diced
3 c. water
2 cardamom pods - toasted and ground
1/4 tsp. turmeric
8 garlic cloves - minced
 
Directions:
 
Dough
 
Mix flour and salt.  Add oil and, using your hands, rub ingredients together to form fine crumbles.  Add water and begin kneading.  Continue kneading and adding water, a couple tablespoons at a time, until you have a firm dough.  Cover with a damp towel and set aside for 30 minutes.
 
Filling
 
Heat oil in a pot on medium high.  Add the onion, garlic, and ginger, cooking until the onion is soft. 
 
 
Stir in the spices, water, tomatoes, and chickpeas.
 
 
Bring water to a boil, then reduce heat to low, cover and simmer until the chickpeas are very soft - about 20 minutes.  Once soft, use a potato masher to mash up the chickpeas a bit then cook another 5 - 10 minutes on medium high, uncovered, to thicken the sauce.
 
Making the samosas
 
Preheat oven to 350F.
 
Lightly knead the dough then divide into 20 equal portions.  Now, 20 makes these very tiny.  I was making them for an event and so I wanted them to be bite sized.  In normal circumstances, you would only want to divide into 8 or 10 equal portions.
 
Roll out each piece, then cut in half.
 
 
Wet the cut edge with water and create a cone.
 

Fill cone and then wet the cone along its circumference and seal.  Because this filling has a fair amount of liquid, I used a slotted spoon.


Alright, so if you didn't realize, the dough in the last two photos does not look like the dough in the first photo.  The original pictures did not come out well and since I had a ton of chickpea masala leftover I made more.  Round two however was made with store bought pizza dough.  Yea, yea, yea, I was feeling lazy.  But, now you get the idea what these babies should look like.
 
After you've sealed the pockets, place onto a baking sheet.  Brush them lightly with oil.
 
 
Place in preheated oven and bake for 30 minutes, or until lightly golden.
 
 
I was quite happy with these, especially attempting a type of food I do not ever make.  The dough was on the softer side.  If you want there to be a bit more crunch, but still not fried, I would turn the heat up on the oven.

Sunday, October 18, 2015

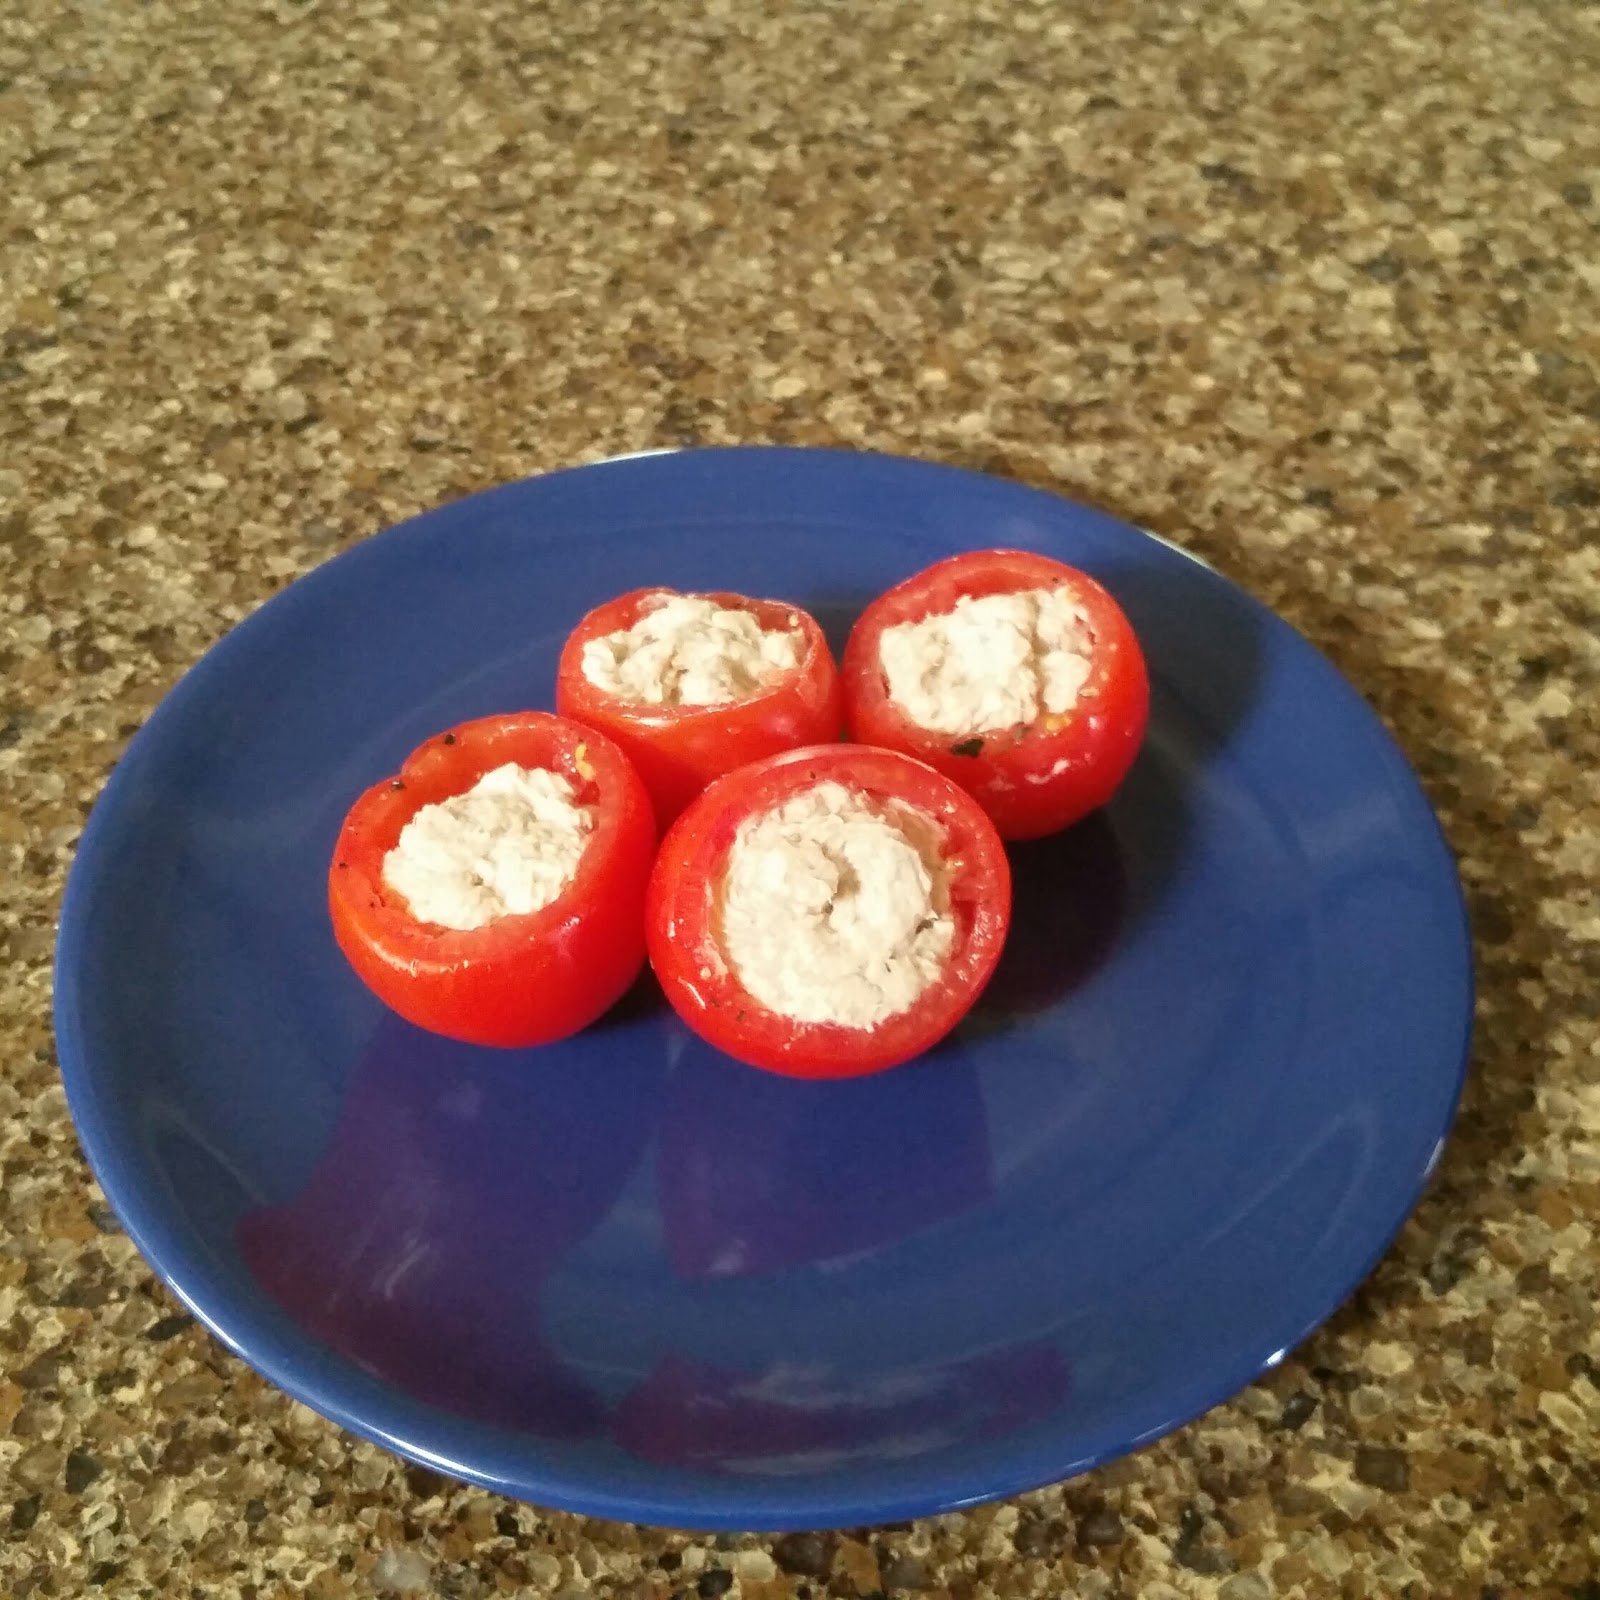
Salmon-Stuffed Tomatoes

Full disclosure...I did modify this recipe to make it more party app -esq.  It is in Maria Luisa's hors d'oeuvres section, but it calls for large tomatoes.  That would have been fine for a sit-down dinner first course.  However, these little nuggets were going to accompany me to a family reunion picnic so I went with campari tomatoes.  Campari tomatoes were a perfect choice because they are firm and can be quite meaty.  They are also large enough to be stuffed while remaining bite sized.

I also chose not to use her mayonnaise recipe.  Eventually, I will jump feet first into homemade mayo.  However, I decided not to risk exposing my entire family to salmonella.  I will allow Maria Luisa to teach me how to make mayonnaise when the only person consuming it will be me.  Once I am confident in my mayo-making skills, I'll force it onto others.

For about half a second I was deluded enough to think I would use fresh salmon.  Who was I kidding?  Not only would fresh salmon be cost prohibitive but, I don't have time for that nonsense.  It would need to be baked, skin removed, then shredded.  Can, can, can.  Though, as a little PSA, if you go the canned route, know what you are grabbing off the shelf.  Depending on the brand and style of canning, you might have to pick through and remove the bones.  I could provide some imagery to reinforce my suggestion, but I'm sure your own imagination is good enough.

In the end, all turned out well.  The stuffed tomatoes were well received, both in look and taste.  There is something about anything stuffed that immediately gets people interested.  It's like there is a secret treasure inside and everyone wants a chance to discover it.

Salmon-Stuffed Tomatoes
Pomodori Ripieni di Salmone


Ingredients:

4 pkgs. campari tomatoes
1 Tbsp white wine vinegar
1 lb canned salmon - drained
4 Tbsp whipped sweet cream butter
3 Tbsp mayonnaise
1 tsp. lemon juice
Salt and pepper

Directions:

Slice about a quarter of an inch off the top of the tomato and carefully scoop out the center.  Sprinkle the inside of each with salt, pepper, and vinegar.  Chill in the refrigerator for 45 minutes.  Turn them upside down for about 10 minutes to drain the juices that the seasoning has brought out of the tomato. 


While the tomatoes are chilling, prepare the filling.  Using an electric beater, combine the salmon, butter, mayonnaise, and lemon juice in a large bowl until thoroughly whipped.  Using a piping bag (or in my case, a zip lock bag with the end snipped off), fill each tomato just to the top.  Put back in the refrigerator until ready to serve.  This made 36 stuffed campari tomatoes.


My only complaint really came under her ingredient list.  She suggested using tuna as well.  Why call the recipe "salmon-stuffed" just to say salmon or tuna in the ingredient list!  Continuity people, is it too much to ask?  If she wanted to give a variety of options, this recipe should have just been called Stuffed Tomatoes.  Okay, end of rant.

Ending on a high note, these really were very tasty.  Whipping all the ingredients together created a nice light texture and the tomatoes remained firm throughout the picnic.  Well worth trying for your next get together

Sunday, August 30, 2015

Broccoli and Potato Pie

Another Saturday.  Another get together with friends.  Another excuse to bust out with a new recipe.

I have always enjoyed my mother's scachatta recipes and were some of my favorite parts of our family picnics growing up.  If you have never experienced the greatness that is scachatta, imagine a calzone cut into strips.  It's pretty basic but makes for excellent party food.  The fillings are typically spinach or broccoli and potatoes along with a serious helping of garlic.  You could also make it sausage or pepperoni to satisfy the meat lovers.  Add a little shredded mozzarella and you have yourself your contribution to the food table.  The fact that the filling can be whatever you wish it to be makes throwing one together with just the current contents of your fridge or a quick trip to the grocers even more appealing.  Of course, it's super annoying when you call your mother for an exact recipe and her response is... "Well I usually do whatever I'm in the mood for.  A little spinach and potato or broccoli and potato.  Sometimes I use sausage.  But make sure you add a lot of garlic." Thanks mom.

My whining aside, knowing that there is no super secret family recipe for scachatta left me room to do as I pleased.  I probably would have done as I pleased anyway, but now it was a justified maneuver instead of cooking rebellion.

I decided that my personal scachatta go to should be broccoli and potatoes with diced tomatoes.  The goal for including the tomatoes was to alleviate the desire for any side marinara sauce.  I also decided to go with phyllo dough instead of pizza dough.  I wanted to have something a bit lighter since this would be just one item on a table full of party food.  You can eat one or two slices of this pie along with everything else people brought and hopefully not feel so guilty at the end of the night.

Broccoli and Potato Pie

Ingredients:

1 whole broccoli crown - chopped
2 large yellow potatoes - diced
1 large tomato - peeled and diced
6 cloves garlic - minced
2 c. mozzarella - shredded
Salt and pepper to taste
1 box phyllo sheets - thawed
Butter or oil for phyllo sheets

Directions:

Chop the broccoli then peel and dice the potatoes.  In a large sauce pot, steam everything until tender - approximately 10 minutes.  Blanche the tomato for about 30 seconds.  Peel, remove seeds, and dice.  Mix everything in a large bowl with the garlic, cheese, salt, and pepper.


Take out the thawed phyllo sheets.  Brush a sheet with oil or butter and place a second sheet on top.  Repeat until you have 4 sheets layered together.  Using a pizza cutter, cut the sheet in half.


Place a healthy spoonful or two (use a serving spoon) of filling into the center for one of the sheets.  Fold the sheet over, covering the filling, and seal the edges with just a little butter, oil, or water.  Fold all of the edges back up to prevent any leakage during baking.  Brush with butter or oil.


Once all the pies have been put together, bake them in an oven preheated to 375F for approximately 25 minutes.  You want them to be a nice golden brown.


Cut into slices once they have cooled.


They really do make a great finger food for your next party. 

Sunday, July 12, 2015

Party Bites


For the last few years, summer always means an afternoon or two spent watching a polo match.  I have friends who will purchase a tailgating plot at two or three matches each season.  They invite 10 to 15 of us to get together, we all bring food to share, play some lawn games before the main event, and just enjoy each other's company.  I enjoy the matches not only for the food everyone brings but also for the fact that "chukka" becomes a normal part of the day's conversations.  Chukka is the proper term for each period of play that makes up the polo match.  You can just add this to the list of weird things I like.  Now, getting back to the food.


The best types of offerings at a gathering like this one are foods that can be easily picked at over time: salsa and chips, any food that comes on a stick, all things bite sized.  This time around I went with cheesecake cups and tortellini and fruit bites.  I went a little fancy for the cheesecake cups because I wanted to try something a bit different.  Instead of using sour cream I chose to use creme fraiche, which I made myself.  The phyllo cups I also made myself out of phyllo sheets.  The recipe for each follows in a bit.

The tortellini and fruit bites were an idea inspired by Pinterest.  I had pinned some "salad on a stick" ideas but I still wanted something a bit more original than just salad.  As I continued to hunt for ideas I came across a pin for a tortellini and fruit salad...on went the light bulb.  The kebabs contain cantaloupe, tortellini, pineapple, tortellini, ending with watermelon.  The dressing is 1 individual container of plain Greek yogurt mixed with 1 Tbsp of honey.


Phyllo cups

Ingredients:

Phyllo dough sheets - thawed
1 stick butter - melted
sugar

Directions:

Preheat oven to 375F and grease a cupcake tin.

Brush a sheet of phyllo dough with melted butter and then sprinkle on some sugar.  Put another sheet of phyllo dough on top and repeat until it is 5 sheets thick.


Using a pizza cutter, cut into 8 squares and then place into the cupcake tray.  Bake for 8 or 9 minutes, being careful not to burn them.  Once they begin to brown, they'll brown up fast so pay attention.

Remove from tray and store in an air tight container in the refrigerator, or wrap and put in freezer, until ready to use.


Creme Fraiche

Ingredients:

1 c. heavy cream
2 Tbsp buttermilk

Directions:

Combine cream and buttermilk in glass jar.  Cover and allow to sit at room temperature for 12 hours or until very thick.  Stir, recover, and store in the refrigerator.


No-Bake Cheesecake Bites

Will make 20 of "my version" small phyllo cups

Ingredients:

1 pkg cream cheese - softened
1/2 c. crème fraiche
1/2 c. confectioners sugar
1 tsp vanilla extract

Directions:

In a large bowl, using an electric beater, cream the softened cream cheese until smooth. Continue to beat, adding the confectioners sugar a little at a time. Once thoroughly combined add the crème fraiche and vanilla. Beat until smooth. Transfer to a large zip lock or pastry bag then chill for 1 or 2 hours. When ready, fill phyllo cups, and then put back in fridge or freeze until ready to serve.


These cheesecake cups come out nice and creamy with just a slight tang from the crème fraiche.  You can top them with fresh berries and they become a wonderful addition to any party.

Sunday, March 29, 2015

Steak and Pesto Pinwheel Bread

I do believe I have already established my love of the Great British Bake Off and so once again we return to a show inspired dishes.  During Season 5, Richard made a Pesto Pinwheel Bread that, according to the judges, looked and tasted quite good.  The look of it is in fact rather intimidating but, I decided I was up for the challenge. 

However, I wanted something a bit heartier than Richard's original recipe.  I wanted something that I felt confident I could just tear off a couple twists, take to work for lunch, and feel completely satisfied.  This is why my version is made with steak.  This bread can be made with anything though.  Pick a few items that entice your own taste buds and make a great party appetizer or fun lunch item for the week.


Ingredients:

Dough:

1 lb 2 oz white flour
1 Tbsp salt
1 oz superfine sugar
10g quick-rise yeast
2 Tbsp unsalted butter
2 eggs - beaten
1/4 c. milk
1/2 c. warm water
olive oil for greasing

Filling:

1 lb stew beef - quarter each cube
1 red onion - quartered and sliced
1 red bell pepper - sliced
5 Tbsp pesto
olive oil for drizzling
1 egg - for egg wash

Directions:

The night before, marinate stew beef in 2 Tbsp pesto.

For the dough:

Put the flour, salt, yeast, sugar, butter, eggs, milk, and 1/8 c. of warm water in your stand mixer.  Using a bread hook, mix until just combined.  Add 1/8 to 1/4 c. of warm water and mix again.  Continue adding portions of the water and mixing until you have a soft dough. 


Turn out the down onto a lightly floured work surface.  Knead for approximately 10 minutes.  You want the dough to be smooth and elastic.  Put the dough into a greased bowl and let rise for one hour.


The vegetables:

Preheat oven to 325F.

Line 2 baking sheets with parchment paper - one for onions and the other for bell pepper.  Drizzle with olive oil and roast for 15 minutes.


Putting it all together:

Turn out the risen dough on a lightly floured work surface and knead for 20 seconds.  Split the dough in half, set aside one portion.

Roll out the dough into a circle with a diameter of approximately 12 inches.  Let rest for 5 minutes and then roll again to diameter of 13 inches.  Place on a pizza tray.

Spread remaining pesto onto the bread then layer with beef, onions, and peppers.


Repeat the above rolling instructions for the top layer.

Wet edges of bottom layer with water then lay down the top layer and join together.

Place a small bowl in the center of the pinwheel and cut 16 equally sized striped coming out from the bowl.

Twist each strip twice.


Set aside to rise for 30 minutes.

Preheat oven to 375F.

Brush the top of the pinwheel with a beaten egg.

Bake for 25 to 30 minutes.


The dough is a bit on the sweeter side, which surprised me at first but I really like.  Don't worry about the sturdiness of the twists, I have not had a problem with the filling falling out once they are ripped off the pinwheel.  It should turn out to be a sturdy bread and it can handle heavy fillings.  Finally, if you cannot find superfine sugar, do not despair.  Use a blender or coffee grinder to turn granulated sugar superfine.  Just a couple of pulses should do the trick.

I wish you the best on your own pinwheel experiment!